
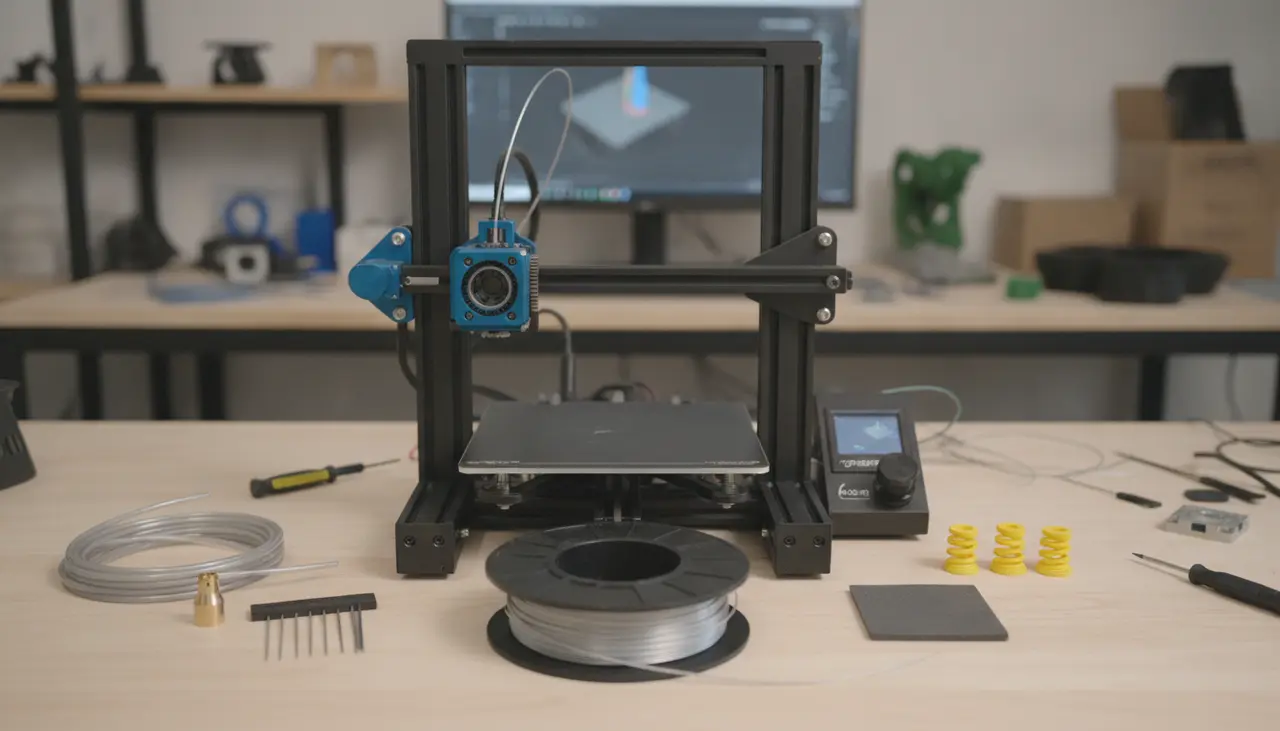
5 Essential Upgrades for Your First 3D Printer: Smoother Prints on a Budget
Affiliate Disclosure: This post contains affiliate links to curated toolkits and parts on Amazon. If you purchase through these links, we may earn a small commission at no extra cost to you, which helps us keep the Nook running!
If you’ve recently unboxed your first FDM printer, you’ve likely experienced that "magic moment" when your first calibration cube finishes. But you might also be noticing some early frustrations: a bed that won't stay level, filament that occasionally slips, or a print that’s stuck so hard to the glass you’re afraid you’ll break it.
The best 3d printer upgrades for beginners are those that address these specific "quality of life" issues. You don't need to rebuild your entire machine to see a massive difference. By focusing on five key areas—bed adhesion, tension stability, filament pathing, extruder durability, and nozzle quality—you can transform a finicky budget machine into a reliable workhorse.
This guide is specifically designed for makers who own a standard desktop FDM printer (like those mentioned in our The Best 3D Printers for Beginners This Year: Start Your Making Journey Today) and want to improve their success rate without spending a fortune.
Quick Comparison: Stock vs. Upgraded Components
| Component | Stock Experience | Upgraded Experience | Difficulty |
|---|---|---|---|
| Build Plate | Often glass or tape; parts stick too well or not at all. | PEI Spring Steel; parts pop off easily when cool. | Very Easy |
| Bed Springs | Soft and loose; requires leveling every 2-3 prints. | Stiff Yellow Springs; holds level for weeks. | Easy |
| PTFE Tubing | Standard white tube; can degrade at high temps. | Capricorn XS; tighter tolerances, higher heat resistance. | Moderate |
| Extruder | Plastic arm; prone to cracking over time. | All-Metal Aluminum; durable and consistent tension. | Easy |
| Nozzles | Generic brass; inconsistent bore quality. | Precision Brass or Hardened Steel; smoother flow. | Easy |
1. PEI Spring Steel Build Plate
Best for: Makers tired of using scrapers or glue sticks.
Most entry-level printers come with a glass bed or a simple sticker. While glass is flat, it can be a nightmare to get prints off. A PEI (Polyetherimide) coated spring steel sheet is a game-changer. It’s magnetic, so you just pull the sheet off, give it a slight flex, and your print pops right off.
- Pros: Incredible adhesion when hot; easy release when cool.
- Cons: Can be damaged if the nozzle is too low (z-offset).
2. Upgraded Bed Springs (The "Yellow Springs")
Best for: Anyone frustrated with constant re-leveling.
If you feel like you’re leveling your bed before every single print, your stock springs are likely too soft. Replacing them with stiff, flat-ended "die springs" (usually yellow in color) provides much more tension. This keeps your leveling knobs from vibrating loose during long prints.
- Pros: Holds a level significantly longer; very inexpensive.
- Cons: Requires a bit of muscle to compress during installation.
3. Capricorn XS Series PTFE Tubing
Best for: Improving print quality and trying new materials.
The tube that guides your filament from the extruder to the hotend is vital. Standard white tubing has a wide internal diameter, which can lead to "slop" during retractions. Capricorn tubing has a much tighter inner diameter and can handle higher temperatures safely. This is especially helpful if you are moving beyond PLA and want to explore PLA vs PETG: Which Filament Should You Start With? for more functional parts.
- Pros: Better retractions (less stringing); handles higher temps better than stock.
- Cons: Tighter tolerances mean very cheap, out-of-spec filament might snag.
4. All-Metal Extruder Feeder Gear
Best for: Preventing "under-extrusion" and mystery clogs.
Many popular printers, including older versions of the Ender 3 series, use a plastic extruder arm. Over time, the tension from the spring can cause the plastic to develop a hairline crack. You won't see it, but you'll notice your prints looking "thinner" or failing halfway through. An aluminum extruder kit is a permanent fix for this common point of failure.
- Pros: Won't crack or warp; provides consistent grip on the filament.
- Cons: Requires recalibrating your "E-steps" (a simple software tweak).
5. High-Quality Nozzle Assortment
Best for: Maintaining a smooth filament flow.
Nozzles are "consumables"—they wear out over time as filament friction erodes the tip. While the nozzles that come with your printer are okay, a high-quality brass nozzle or a hardened steel nozzle (if you're using abrasive filaments like wood-fill) ensures the hole stays exactly 0.4mm. Keeping a toolkit of various sizes is one of the smartest 3d printer upgrades for any home lab.
- Pros: Reduces clogs; improves surface finish.
- Cons: Steel nozzles require slightly higher print temperatures than brass.
Common Beginner Mistakes When Upgrading
- Changing Everything at Once: This is the biggest pitfall. If you install five upgrades and your printer stops working, you won’t know which part caused the issue. Install one, run a test print, and then move to the next.
- Overtightening the Extruder: It’s tempting to crank the tension up, but too much pressure can flatten your filament, making it hard to push through the tube.
- Forgetting the Z-Offset: If you switch from a thin sticker to a thicker PEI plate, you must adjust your Z-limit switch or digital offset. If you don't, your nozzle might crash into your beautiful new build plate!
FAQ: Upgrading Your First Printer
Will these upgrades void my warranty? Generally, no. Most desktop printers are designed to be modular. Replacing "consumable" parts like springs, nozzles, or tubes is considered standard maintenance. However, always check your manufacturer's specific terms.
Do I need these if I just bought a newer printer like the Creality Ender 3 V3 SE? Newer machines often come with some of these upgrades (like a PEI plate) pre-installed! Before buying, check your printer's specs. If you're still deciding on a machine, our The 3D Print Nook Master Buying Guide: How to Choose Your First Home 3D Printer can help you see which models already include these features.
Is it hard to install the PTFE tubing? It’s a 10-minute job! The most important part is ensuring the cut is perfectly square. Most Capricorn kits come with a small blue plastic cutter to help you get that perfect 90-degree angle.
Final Thoughts
Upgrading your printer should be a fun part of the hobby, not a chore. By starting with these five simple, cost-effective parts, you’re not just buying gear—you’re buying peace of mind. You’ll spend less time fiddling with leveling knobs and more time watching your creations come to life. Happy making!